EMG HZ Humbucker Pickups and Splitting - A Natural Fit
I'm a curious sort of Bear. I like to see how stuff ticks - how does it work, and how can I make it do something interesting? Multi-wire humbucking or multi-coil pickups just beg to be split or tapped in some way. Why not have a few new sounds in your guitar? Usually, the cost is only a couple of dollars more than "standard" components (for the push-pull pots, the 5-way super switch, or the little mini switch(es)).
I've been working with lots of customizations using G&B Black-face pickups, and especially USA-made EMG HZ pickups. I've tinkered with early OEM-supplied HZs, all the way to HZ4 and HZ4A pickups. These pickups are really very easy to split! They come wired for weather, and the QuickConnect wiring harness used on these pickups makes it easy to drop them into a split-sound guitar. Bear in mind that EMG active pickups do not have the same wiring scheme and are usually not specifically splittable. The epoxy encasement generally prevents messing with the humbucker pickup's internal preamp and the wiring around the blades and windings.
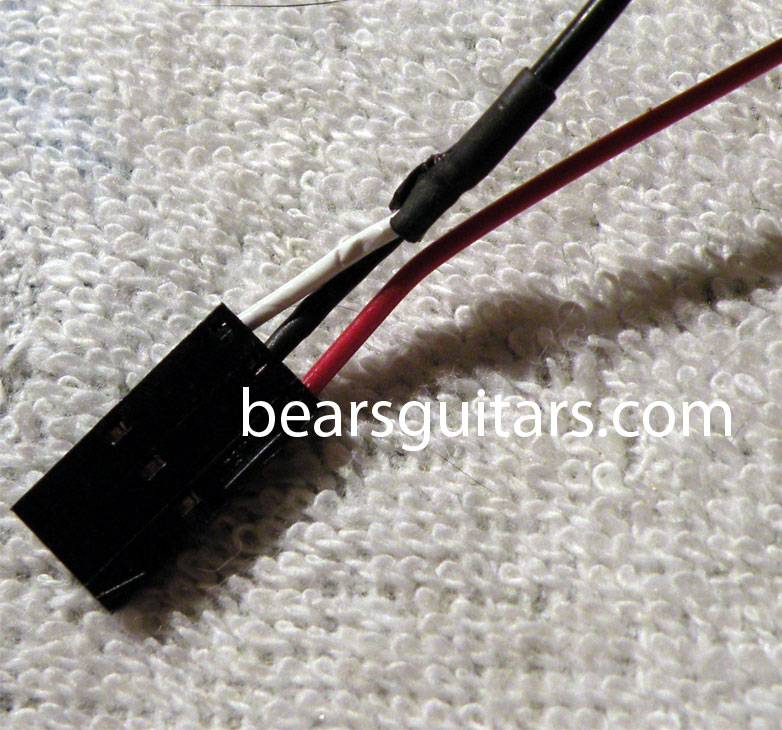
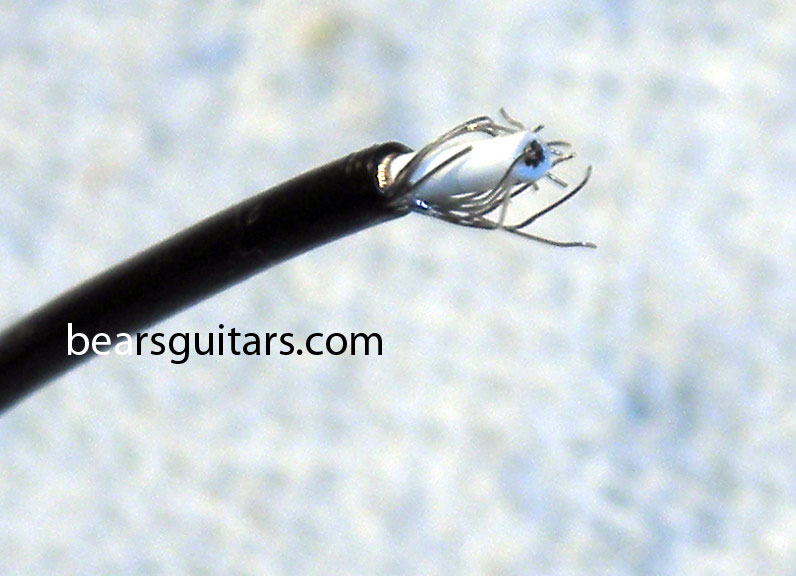
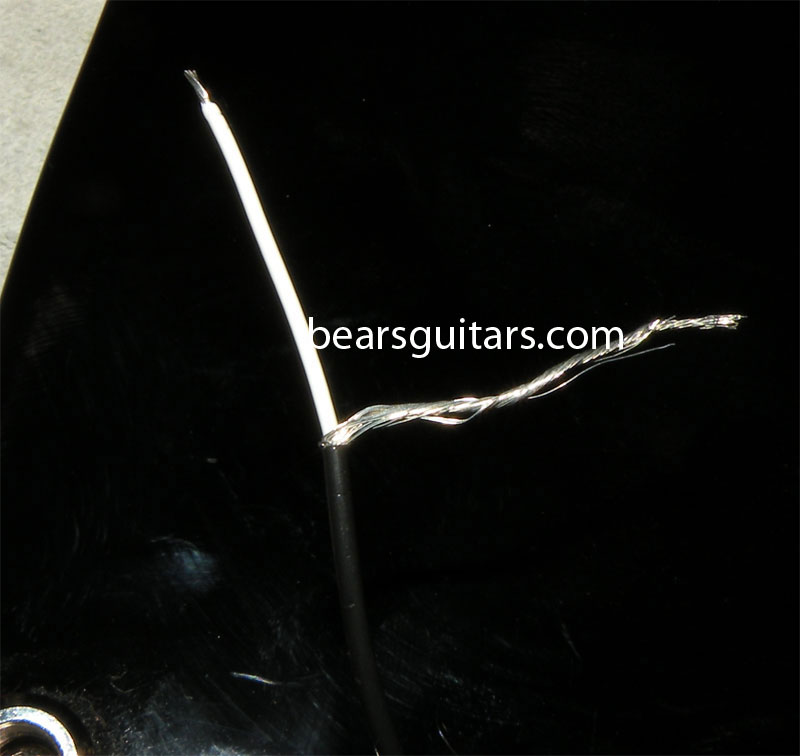
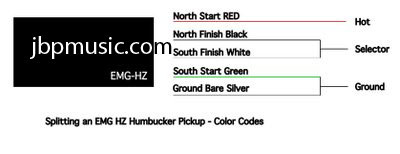
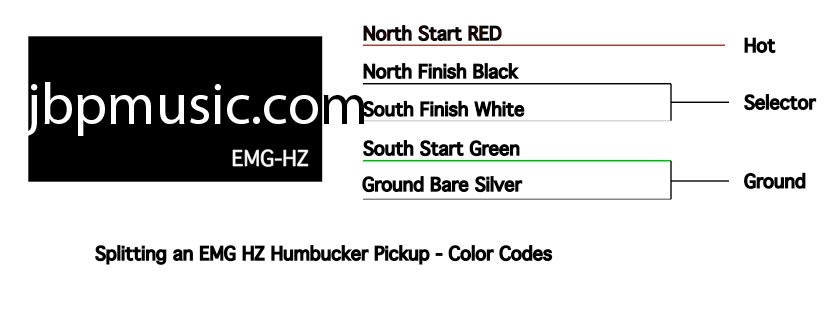
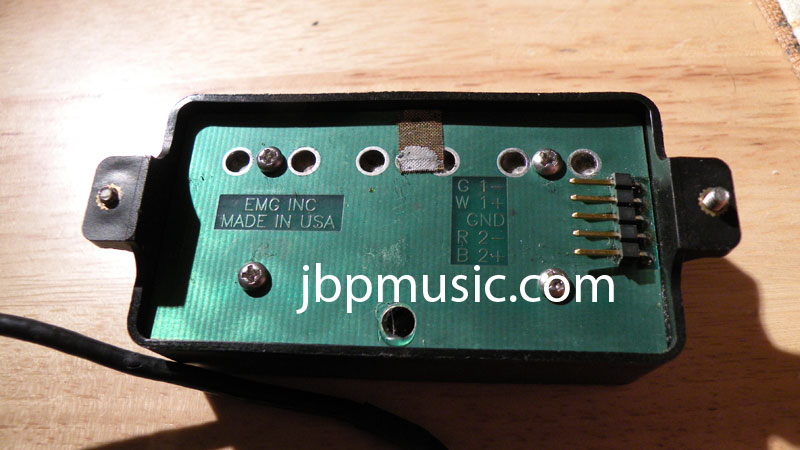
From the factory, the QuickConnect harness already has the North Start wire (hot) singled out, the North End and South Start are already connected together and tinned (although they are usually folded back and shrink-tubed to the wire bundle), The South End and the Bare Ground are usually together, although I've seen some Polish-made harnesses that have the bare and South End as separate wires. Here's a picture depicting the way EMG HZ wire color coding works:
There are lots of good places to look up wiring diagrams on the 'net. Two of my favorites are the guitarelectronics.com website diagrams page, and the seymourduncan.com website diagrams page. The GuitarElectronics.com website does have color diagrams for many different types and brands of pickups... before you get stumped, look there. I also like the Seymour site because the diagrams are well-drawn and flawlessly implemented. Not all wiring diagrams are created equal. The same wiring concept can be done in different ways, even with the same components.
Here are a few close-ups of some of the EMG HZ pickups with which I've been working this week. Some are older OEM (installed as original equipment on guitars like ESPs, Jacksons, and others) and some are the retail-boxed variety you can purchase at most musical instrument sales sites.
I've taken some nice close-up pictures of a few different varieties of EMG HZ pickups - the good news is that the wiring scheme is the same among all of them.
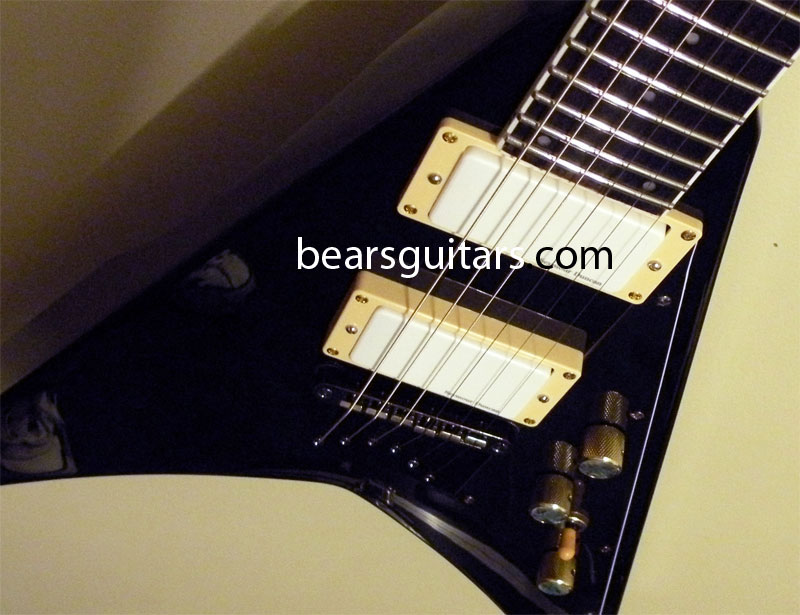
An EMG HZ FH2, installed in one of my recent projects - a nice ESP EC-100QM
The typical appearance of an EMG HZ (either H4 or H4, as well as some other interesting OEM variants)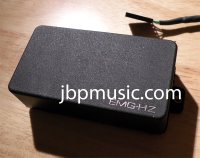
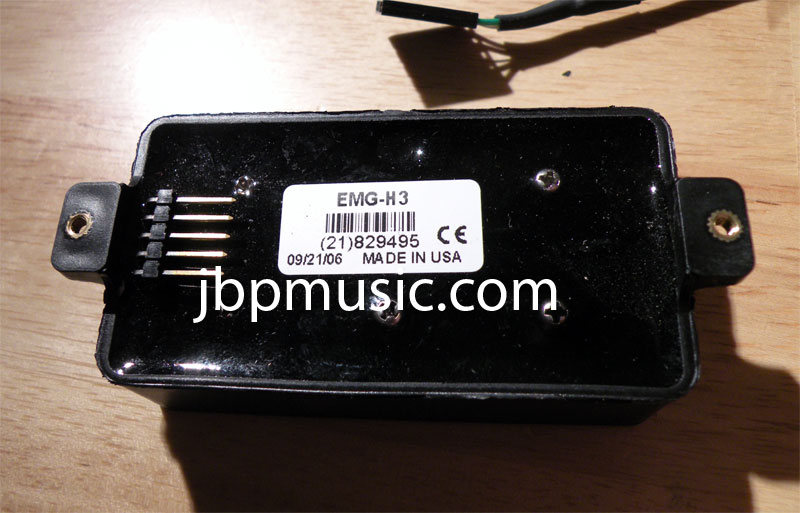
A nice-sounding EMG HZ H3 on the back side: note the black shiny epoxy-filled cavity...

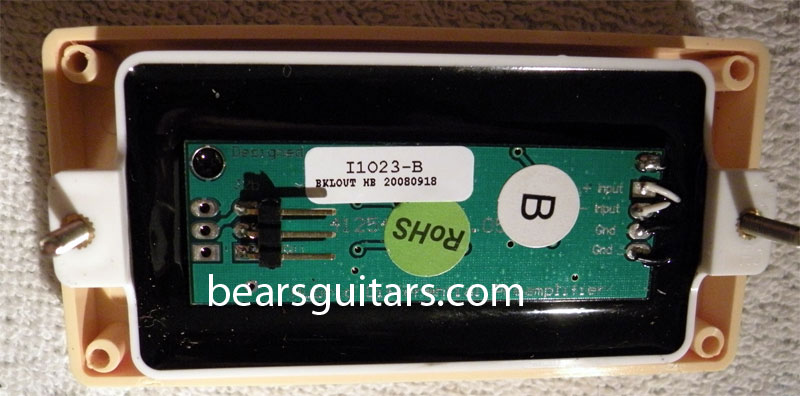
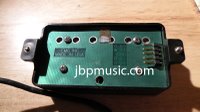
A typical, early-style EMG HZ OEM pickup on the backside... I like the PCB notes on plus and minus and such... Clear epoxy on this one.
Here's a nice OEM EMG HZ pickup from the back, with the quick-connect installed. I LIKE the quick-connect on EMGs (and on Seymour Duncan's Blackouts (I love those Seymours!). I have gotten a guitar all put together, wired up, strung up, and decided to change the pickup after things are all put together. It takes only a few minutes and you can completely change the sound of your guitar without having to change ANY wiring!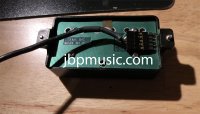
I've been working with lots of customizations using G&B Black-face pickups, and especially USA-made EMG HZ pickups. I've tinkered with early OEM-supplied HZs, all the way to HZ4 and HZ4A pickups. These pickups are really very easy to split! They come wired for weather, and the QuickConnect wiring harness used on these pickups makes it easy to drop them into a split-sound guitar. Bear in mind that EMG active pickups do not have the same wiring scheme and are usually not specifically splittable. The epoxy encasement generally prevents messing with the humbucker pickup's internal preamp and the wiring around the blades and windings.
From the factory, the QuickConnect harness already has the North Start wire (hot) singled out, the North End and South Start are already connected together and tinned (although they are usually folded back and shrink-tubed to the wire bundle), The South End and the Bare Ground are usually together, although I've seen some Polish-made harnesses that have the bare and South End as separate wires. Here's a picture depicting the way EMG HZ wire color coding works:
There are lots of good places to look up wiring diagrams on the 'net. Two of my favorites are the guitarelectronics.com website diagrams page, and the seymourduncan.com website diagrams page. The GuitarElectronics.com website does have color diagrams for many different types and brands of pickups... before you get stumped, look there. I also like the Seymour site because the diagrams are well-drawn and flawlessly implemented. Not all wiring diagrams are created equal. The same wiring concept can be done in different ways, even with the same components.
Here are a few close-ups of some of the EMG HZ pickups with which I've been working this week. Some are older OEM (installed as original equipment on guitars like ESPs, Jacksons, and others) and some are the retail-boxed variety you can purchase at most musical instrument sales sites.
I've taken some nice close-up pictures of a few different varieties of EMG HZ pickups - the good news is that the wiring scheme is the same among all of them.
An EMG HZ FH2, installed in one of my recent projects - a nice ESP EC-100QM
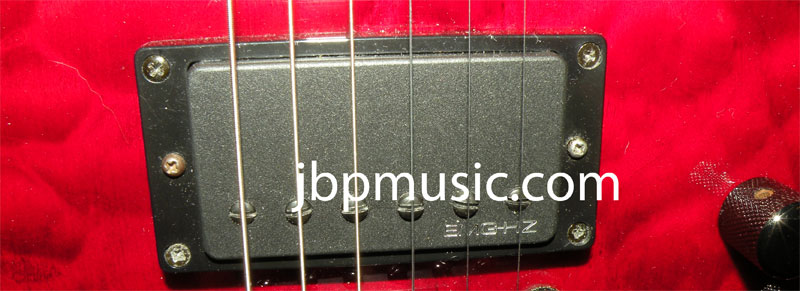
The typical appearance of an EMG HZ (either H4 or H4, as well as some other interesting OEM variants)

A nice-sounding EMG HZ H3 on the back side: note the black shiny epoxy-filled cavity...
A typical, early-style EMG HZ OEM pickup on the backside... I like the PCB notes on plus and minus and such... Clear epoxy on this one.
Here's a nice OEM EMG HZ pickup from the back, with the quick-connect installed. I LIKE the quick-connect on EMGs (and on Seymour Duncan's Blackouts (I love those Seymours!). I have gotten a guitar all put together, wired up, strung up, and decided to change the pickup after things are all put together. It takes only a few minutes and you can completely change the sound of your guitar without having to change ANY wiring!

Labels: coil split, coil tap, diagram, EMG, emg hz, guitar mod, how to, humbucker, humbuckers, mod, modification, passive, wire colors, wiring harness
posted by Jim Pearson at
2:34 PM
1 Comments
![]()
![]()