The Secret Handshake of Installing Seymour Duncan Blackouts!
The Secret Handshake of Installing Seymour Duncan Blackout Pickups
(Or, in my case, Whiteouts)...
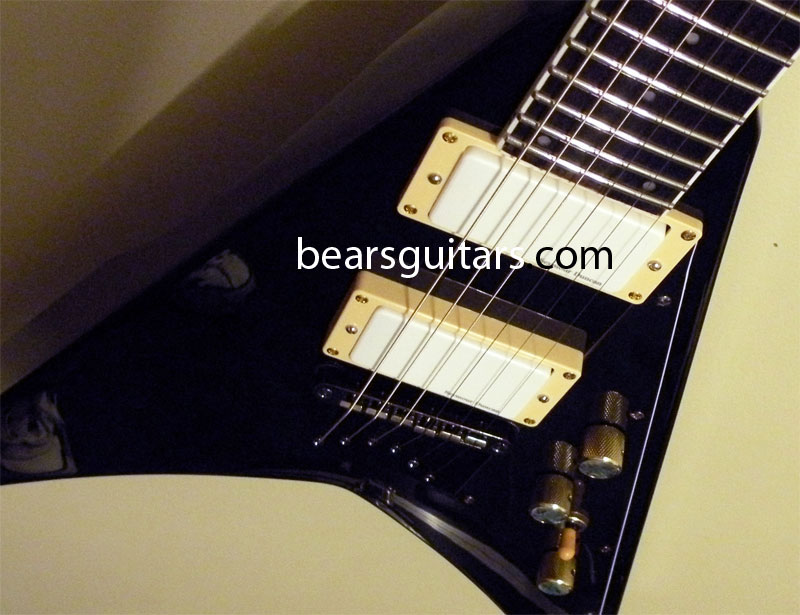
I recently installed a matched pair of Seymour Duncan Blackouts in my ESP LTD V200 vee guitar!
Today's entry will be a little about the Blackouts (which were white, in my case!), and a little about the ESP LTD V200.
First and formost: I'm converting my Vee to Blackouts, and about half way thorough the tear-down/build-up, I notice that the quick connectors (something like EMG Quik-Connects) have three wires in, two wires out - and all the diagrams refer to a red wire, a white wire, and a bare wire. I'm thinking (at this point) that the venerable and always reliable Seymour folks have gone loony and have given me the wrong parts. I wanted to split my coils, as well as get the full benefit of the next-generation active humbuckers!
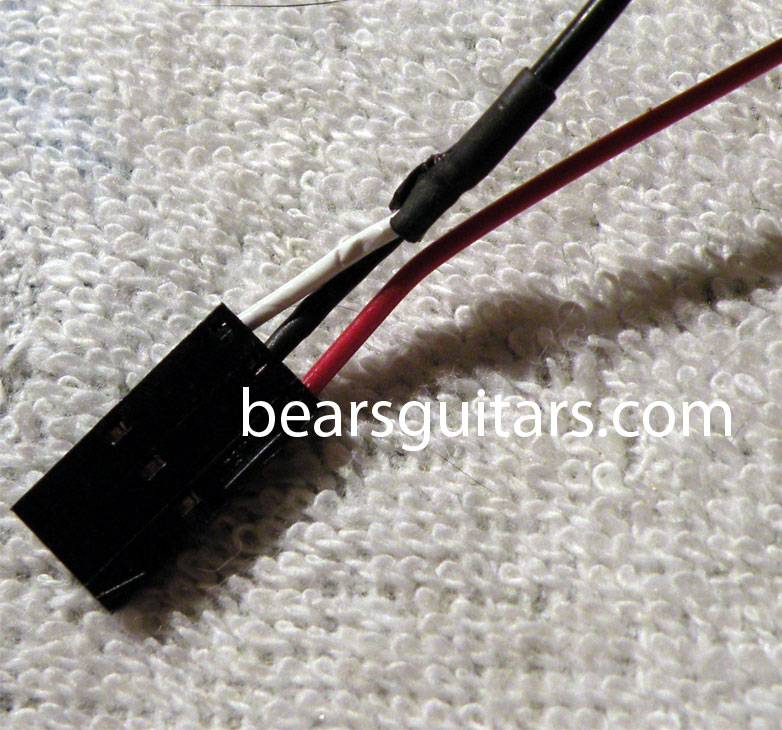
I'm in distress at this point. I've got the whole guitar and all the parts exploded on my little work table, and I'm at a dead stop. I can connect RED to the red wire of the battery lead. But the "black wire" is a complete mystery and doesn't fit in anywhere.
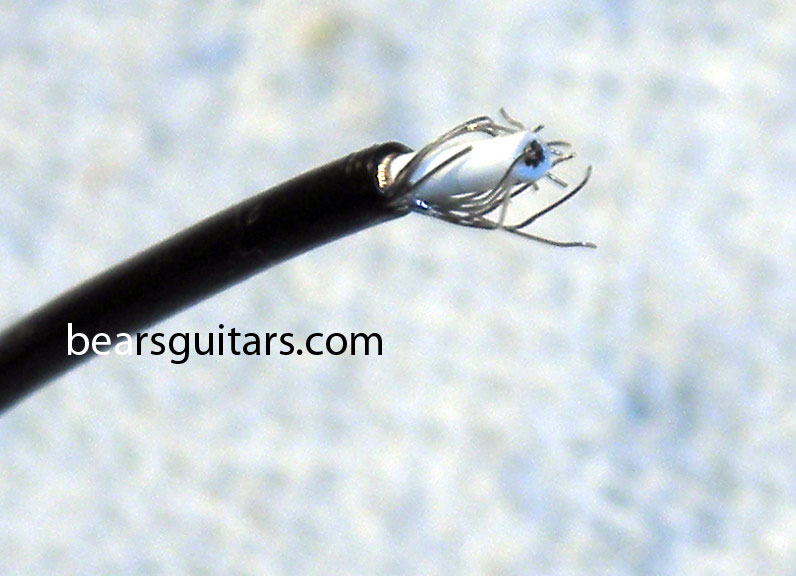
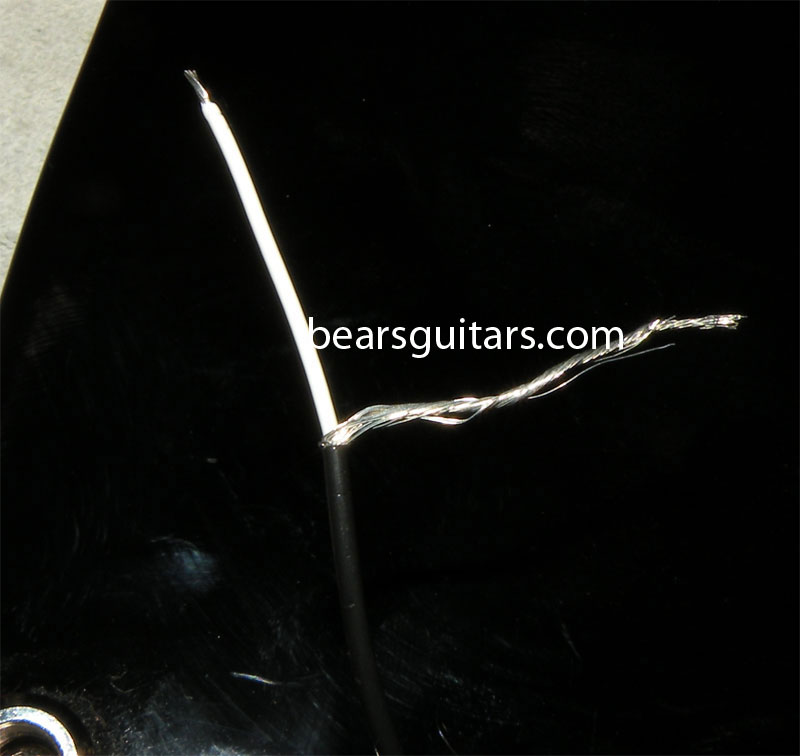
Google is your friend. Repeat after me, Google is your friend. Lots of searching and trying to find the right terms, and I get the answer for which I'm looking... The "black wire" is actually a wrapped two-wire lead. Strip back the black, and you get the bare wrap-around wire, a white insulator, and the internal lead to the white insulator. Voila! Red, bare, and white!
After this monumental revelation (which is NOT OBVIOUS AT ALL in the instructions or in the quick connectors in hand!!!!!!!!!!!!!!), the rest was cake (I prefer german chocolate cake, personally)...
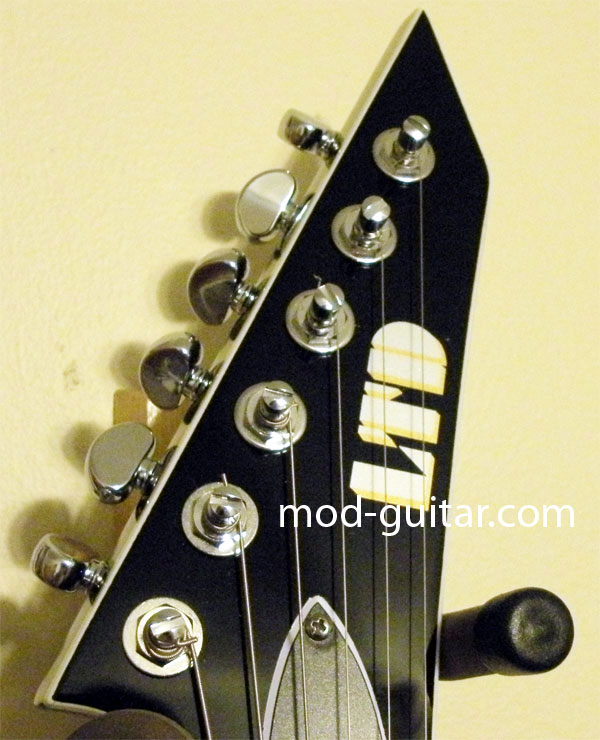
On to the ESP LTD V200. What a guitar! (I'll write a review for it at http://theguitarreview.com soon.)
I used white Seymour Duncan Blackouts;
Gibson cream humbucker rings (I like them to stand out and contrast);
Gold-and-abalone set-screw Telecaster-style knobs (Great looking, easy to push/pull);
A real USA-made CRL/Fender three-way switch;
NICE Alpha 500 kOhm push/pull potentiometers;
REAL USA copper wiring;
Silver-bearing solder;
Insulated four-wire from the jack to the pots;
REAL USA Switchcraft stereo jack (stereo is required for active pickup setups - DON'T (READ: DON'T) wire the body grounds into the setup or it will drain the battery over night. The third prong of the stereo input jack creates the circuit ground;
Grover 6-inline locking tuners(!);
Great gold screws;
Dressed and round-ended fretwires;
Real carnauba wax;
And lots of attention to detail (like a nice bare copper ground wire common running across the pots, etc.);
A good battery clip;
Careful electrician's tape covers on all exposed complex areas (top of switch contacts, push/pull solder groups, etc.).

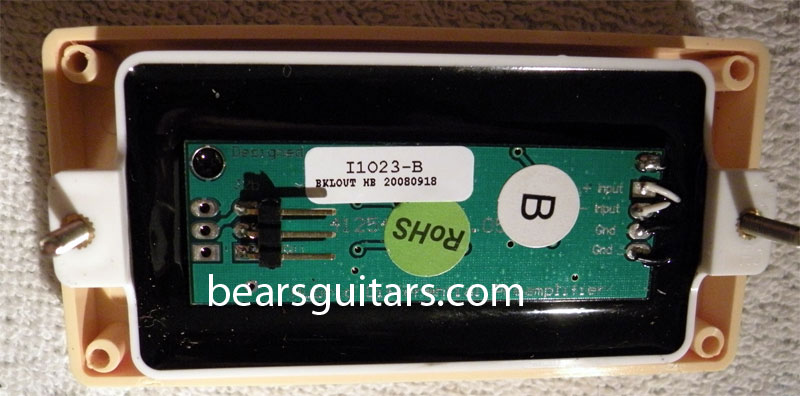
I've included lots of pictures of the sneaky "black wire" in the Blackout pickups, a nice shot of the back of a blackout, and some (OK) pictures of the finished V.
I can now shred, split and do old rock and roll, do mellow warm humbucker stuff, and lots of progressive rock (my favorite).
Ask questions, please! Want a step by step HOWTO? Let me know. It'll take a bit to put it in my schedule, but I'd love to do it for you.
Until then, Bear at BearsGuitars.com and JBPMusic.com (where my music CDs are!)
Labels: active, black, blackout, cream, duncan, EMG, emg 81, emg 85, esp, esp v, esp v200, humbuckers, pickups, seymour, seymour duncan, v200, white
posted by Jim Pearson at
5:02 PM
1 Comments
![]()
![]()


